Seguramente has visto páginas en las que te muestran el paso del tiempo en personajes famosos, parajes donde ha ocurrido algún desastre natural o simplemente, una foto después de ciertos retoques con Photoshop... En dichas páginas muestran imágenes del antes y el después del tema a tratar, si cogemos el ejemplo del envejecimiento del famoso, veremos fotos de cuando era joven y fotos en la actualidad. Lo que más choca de estas páginas es que, mediante un selector, somos capaces de comparar esas imágenes mediante un scroll situado en el centro de la imagen y podemos elegir o mostrar el antes, o mostrar el después.
En este artículo veremos de desarrollar esta funcionalidad mediante ciertos plugins de jQuery. Es decir, veremos cómo crear un efecto muy vistoso de antes y después en imágenes con jQuery. Por cierto, este elemento funcionará tanto en versiones antiguas de IE, como en Firefox, Chrome y Safari.
HTML
El HTML para desarrollar el efecto de antes y después es muy simple. En él solo habrá un div con dos imágenes en su interior. Cosas que debes saber...
- El valor del atributo ALT se convertirá en la leyenda de la imagen
- El ancho y alto de la primera imagen se utilizará para distintos cálculos, por lo cual, es obligatorio definirlo.
Esto es lo que necesitas utilizar:
<div class="beforeafter">
	<img src="image-1.jpg" alt="Before" width="500" height="280">
        <img src="image-2.jpg" alt="After" width="500" height="280">
</div>
De todas maneras, el contenido en el div será totalmente renovado una vez que se procese mediante javascript. Esta será la estructura real:
<div class="beforeafter">
	<div class="ba-mask"></div>
	<div class="ba-bg"></div>
	<div class="ba-caption"></div>
	<img src="image-1.jpg" alt="Before" width="500" height="280">
	<img src="image-2.jpg" alt="After" width="500" height="280">
</div>
<div class="beforeafter">
	<img src="image-1.jpg" alt="Before" width="500" height="280">
        <img src="image-2.jpg" alt="After" width="500" height="280">
</div>
CSS
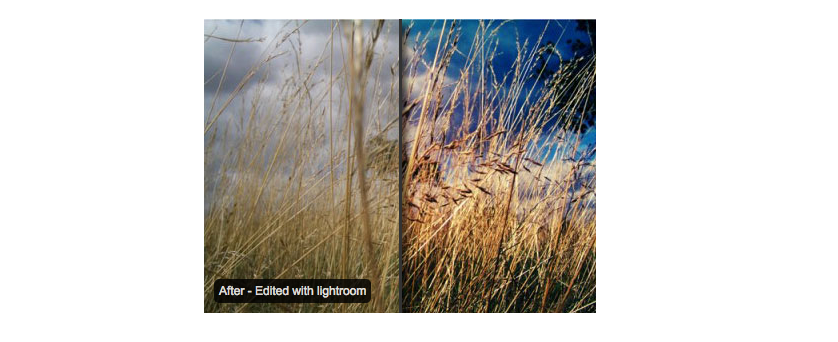
El CSS tampoco es muy complicado. Para aclarar las cosas, adjunto una imagen para que veas más claramente cómo funciona el código.

#container {width:500px; margin:0 auto;}

/* width and height for the block */
.beforeafter {width:500px; height:280px;}


/* The following is the mandatory styling for the plugins */

.ba-mask {	/* first image */
	position:absolute;
	top:0;
	left:0;
	z-index:100;
	border-right:4px solid #000;
	overflow:hidden;
	box-shadow: 3px 5px 5px rgba(0, 0, 0, 0.6);
	box-shadow: 5px 5px 10px rgba(0, 0, 0, 0.6);
	-webkit-box-shadow: 5px 5px 7px rgba(0, 0, 0, 0.6);
	-moz-box-shadow: 5px 0 7px rgba(0, 0, 0, 0.6);
}

.ba-bg {	/* second image */
	position:absolute;
	top:0;
	left:0;
	z-index:0;
}

.ba-caption {	/* caption	*/

	/* mandatory */
	position:absolute;
	bottom:10px;
	left:10px;
	z-index:120;

	/* customizable styling */
	background:#000;
	color:#fff;
	text-align:center;
	padding:5px;
	font-size:12px;
	font-family:arial;
	filter:alpha(opacity=80);-moz-opacity:0.8;-khtml-opacity: 0.8;opacity: 0.8;
	-webkit-border-radius:5px; -moz-border-radius:5px; border-radius:5px;
}
Javascript
Ok, llegamos al meollo del asunto. La longitud del script es bastante larga, debido a que estoy tratando de hacer que este script sea lo más flexible posible y también porque quiero queel código HTML y CSS sea lo más simple posible.
$(document).ready(function() {

	// Some options for customization
	var leftgap = 10;		/* gap on the left */
	var rightgap = 10;		/* gap on the right */
	var defaultgap = 50;	/* the intro gap */
	var caption = true;		/* toggle caption */
	var reveal = 0.5;		/* define 0 - 1 far does it goes to reveal the second caption */

	// find each of the .beforeafter
	$('.beforeafter').each(function () {

		// set current selected item to variable
		var i = $(this);
		// get the source of the first image and second image using eq(index)
		var img_mask = i.children('img:eq(0)').attr('src');
		var img_bg = i.children('img:eq(1)').attr('src');

		// get the caption for the first image as default caption
		var img_cap_one = i.children('img:eq(0)').attr('alt');

		// get the dimension of the first image, assuming second image has the same dimension
		var width = i.children('img:eq(0)').width();
		var height = i.children('img:eq(0)').height();

		// hide the images, not removing it because we will need it later
		i.find('img').hide();

		// set some css attribute to current item for graceful degradation if javascript support is off
		i.css({'overflow': 'hidden', 'position': 'relative'});

		// append additional html element
		i.append('
');
		i.append('
');
		i.append('
');

		// set the dimension of appended html element
		i.children('.ba-mask, .ba-bg').width(width);
		i.children('.ba-mask, .ba-bg').height(height);

		// set the images as background for ba-mask and ba-bg
		i.children('.ba-mask').css('backgroundImage','url(' + img_mask + ')');
		i.children('.ba-bg').css('backgroundImage','url(' + img_bg + ')');

		// animate to reveal the background image
		i.children('.ba-mask').animate({'width':width - defaultgap}, 1000);

		// if caption is true, then display it, otherwise, hide it
		if (caption) i.children('.caption').show();
		else i.children('.ba-caption').hide();

	}).mousemove(function (e) {

		// set current selected item to variable
		var i = $(this);

		// get the position of the image
		pos_img = i.offset()['left'];

		// get the position of the mouse pointer
		pos_mouse = e.pageX;

		// calculate the difference between the image and cursor
		// the difference will the width of the mask image
		new_width = pos_mouse - pos_img;
		img_width = i.width();

		// get the captions for first and second images
		img_cap_one = i.children('img:eq(0)').attr('alt');
		img_cap_two = i.children('img:eq(1)').attr('alt');

		/*
		// for debugging purposes
		$('#debug').html("X Axis : " + e.pageX + " | Y Axis " + e.pageY);
		$('#debug2').html(i.position()['left']);
		$('#debug3').html(new_width);
		*/

		// make sure it reveal the image and left some gaps on left and right
		// it depends on the value of leftgap and rightgap
		if (new_width > leftgap && new_width < (img_width - rightgap)) {
			i.children('.ba-mask').width(new_width);
		}

		// toggle between captions.
		// it uses the reveal variable to calculate
		// eg, display caption two once the image is 50% (0.5) revealed.
		if (new_width < (img_width * reveal)) {
			i.children('.ba-caption').html(img_cap_two);
		} else {
			i.children('.ba-caption').html(img_cap_one);
		}

	});

 });
Conversión a plugin
En primer lugar, necesitamos conocer la estructura de un plugin. Si no tienes mucha idea de cómo funciona un plugin de jQuery ni tampoco de qué consta su estructura, puedes pasarte por esta página de queness.com en la que te lo explican de la mejor forma posible. En el script de abajo verás la estructura que vamos a utilizar en este tutorial:
//You need an anonymous function to wrap around your function to avoid conflict
(function($){

    //Attach this new method to jQuery
    $.fn.extend({

        //This is where you write your plugin's name
        pluginname: function() {

            //Iterate over the current set of matched elements
            return this.each(function() {

                //code to be inserted here

            });
        }
    });

//pass jQuery to the function,
//So that we will able to use any valid Javascript variable name
//to replace "$" SIGN. But, we'll stick to $ (I like dollar sign :) )
})(jQuery);
Lo siguiente que tenemos que hacer será mezclar la estructura del plugin con el anterior script. Este es el resultado final:
(function($){
   $.fn.extend({
		//plugin name - qbeforeafter
		qbeforeafter: function(options) {

			var defaults = {
				defaultgap: 50,
				leftgap: 10,
				rightgap: 10,
				caption: false,
				reveal: 0.5
			};

			var options = $.extend(defaults, options);

			return this.each(function() {

            var o = options;
            var i = $(this);
			var img_mask = i.children('img:eq(0)').attr('src');
			var img_bg = i.children('img:eq(1)').attr('src');
			var img_cap_one = i.children('img:eq(0)').attr('alt');

			var width = i.children('img:eq(0)').width();
			var height = i.children('img:eq(0)').height();

			i.children('img').hide();

			i.css({'overflow': 'hidden', 'position': 'relative'});
			i.append('
');
			i.append('
');
			i.append('
');

			i.children('.ba-mask, .ba-bg').width(width);
			i.children('.ba-mask, .ba-bg').height(height);
			i.children('.ba-mask').animate({'width':width - o.defaultgap}, 1000);

			i.children('.ba-mask').css('backgroundImage','url(' + img_mask + ')');
			i.children('.ba-bg').css('backgroundImage','url(' + img_bg + ')');

			if (o.caption) i.children('.ba-caption').show();

            }).mousemove(function (e) {

				var o = options;
				var i = $(this);

				pos_img = i.offset()['left'];
				pos_mouse = e.pageX;
				new_width = pos_mouse - pos_img;
				img_width = i.width();
				img_cap_one = i.children('img:eq(0)').attr('alt');
				img_cap_two = i.children('img:eq(1)').attr('alt');

				if (new_width > o.leftgap && new_width < (img_width - o.rightgap)) {
					i.children('.ba-mask').width(new_width);
				}

				if (new_width < (img_width * o.reveal)) {
					i.children('.ba-caption').html(img_cap_two);
				} else {
					i.children('.ba-caption').html(img_cap_one);
				}

			});
        }
   });
})(jQuery);
Si lo comparamos con el script que no es el plugin, la principal diferencia es la forma en que convertimos los ajustes personalizables (defaultgap, leftgap, rightgap, caption y reveal) a los plugins. Eso es todo, bastante simple, sólo copiar y pegar y una ligera modificación
Cómo utilizarlo
Usarlo es muy simple, así es como llamaremos al plugin:
$(function () {
	$('.large').qbeforeafter({defaultgap:50, leftgap:0, rightgap:10, caption: true, reveal: 0.5});
	$('.small').qbeforeafter({defaultgap:20, leftgap:5, rightgap:10, caption: false});
});
Fuente: queness.com