
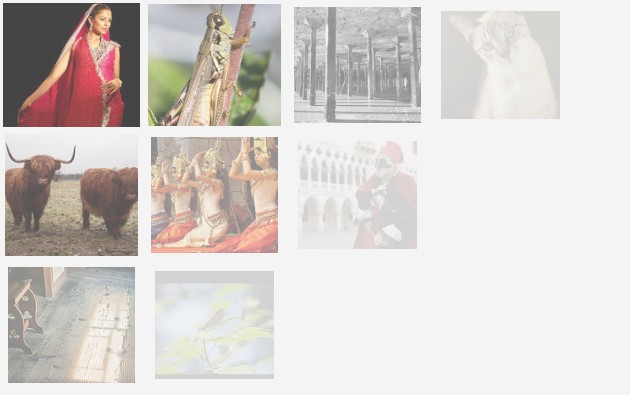
En este tutorial vamos a crear una galería de imágenes con un efecto diagonal creado a partir de las transiciones que nos ofrece CSS3. La aplicación recorrerá el directorio donde están almacenadas las imágenes para luego mostrarlas en la galería creada. Añadir nuevas imágenes a esta galería será tan fácil como añadir dos nuevos fichero, uno correspondiente a la imagen original y otro a la miniatura que se mostrará, a nuestro directorio.
En navegadores viejos, no se contemplará el efecto diagonal que hemos creado al no ser capaces de interpretar los estilos CSS3, pero a pesar de esto, la galería funcionará de forma correcta.
HTML
<!DOCTYPE html>
<html>
    <head>

        <meta charset="utf-8"/>

        <title>Smooth Diagonal Fade Gallery with CSS3 Transitions</title>


        <!-- The Swipebox plugin -->

        <link href="assets/swipebox/swipebox.css" rel="stylesheet" />


        <!-- The main CSS file -->

        <link href="assets/css/style.css" rel="stylesheet" />


        <!--[if lt IE 9]>

            <script src="http://html5shiv.googlecode.com/svn/trunk/html5.js"></script>

        <![endif]-->

    </head>


    <body>


        <div id="loading"></div>


        <div id="gallery"></div>


        <!-- JavaScript Includes -->

        <script src="https://ajax.googleapis.com/ajax/libs/jquery/1.10.0/jquery.min.js"></script>

        <script src="assets/swipebox/jquery.swipebox.min.js"></script>

        <script src="assets/js/jquery.loadImage.js"></script>

        <script src="assets/js/script.js"></script>


    </body>

</html>
La galería hará uso de la librería jQuery que es incluida antes del cierre del tag “body”. También hemos añadido el plugin lightbox Swipebox pero puedes utilizar el que más te guste. El div #loading tiene el gif animado de carga mientras que el div #gallery es el que corresponde a la galería de fotos. A este segundo div le añadimos la propiedad “position: fixed” para que coja todo el alto y el ancho de la página.
Escaneando las fotos con PHP
Las fotos estarán almacenadas en dos contenedores dentro del servidor. Para las miniaturas, la ruta será “assets/potos/thumbs/” mientras que para las imágenes la ruta será “assets/potos/large/”. Con PHP recorreremos esos directorios y crearemos una estructura JSON con el nombre de los archivos.
$files = glob('assets/photos/large/*.jpg');


$data = array();

foreach($files as $f){

    $data[] = array(

        'thumb' => str_replace('large', 'thumbs', $f),

        'large' => $f

    );

}


// Duplicate the photos a few times, so that we have what to paginate in the demo.

// You most certainly wouldn't want to do this with your real photos.

// $data = array_merge($data, $data);

// $data = array_merge($data, $data);

// $data = array_merge($data, $data);


header('Content-type: application/json');


echo json_encode(array(

    'data' => $data,

));
Ahora que ya tenemos el código que nos devuelve el listado de imágenes de nuestra galería, vamos a proceder con el código correspondiente a JavaScript.
JavaScript
Lo que necesitamos hacer es lo siguiente:
1. En primer lugar vamos a solicitar mediante una petición AJAX GET el listado de imágenes de la galería.
2. Luego calcularemos cuantas fotos hay para mostrar en la página y sus tamaños para organizarlas de forma correcta dependiendo del tamaño de la página.
3. Precargaremos todas las imágenes con un script que usará jQuery Deferreds. Mientras que esto ocurre, mostraremos el gif animado en el contenedor #loading.
4. Después de estar precargadas, generaremos el código de las imágenes y lo añadiremos dentro del contenedor #gallery.
5. Cuando se pulse en las flechas, repetiremos los pasos 3 y 4.
A continuación os dejamos el código, aunque lo hemos dividido en varias partes.
$(function(){

    // Global variables that hold state

    var page = 0,

        per_page = 100,

        photo_default_size = 150,

        picture_width = photo_default_size,

        picture_height = photo_default_size,

        max_w_photos, max_h_photos

        data = [];

    // Global variables that cache selectors

    var win = $(window),

        loading = $('#loading'),

        gallery = $('#gallery');


    gallery.on('data-ready window-resized page-turned', function(event, direction){


        // Here we will have the JavaScript that preloads the images

        // and adds them to the gallery


    });


    // Fetch all the available images with

    // a GET AJAX request on load


    $.get('load.php', function(response){


        // response.data holds the photos


        data = response.data;


        // Trigger our custom data-ready event

        gallery.trigger('data-ready');


    });


    gallery.on('loading',function(){

        // show the preloader

        loading.show();

    });


    gallery.on('loading-finished',function(){

        // hide the preloader

        loading.hide();

    });


    gallery.on('click', '.next', function(){

        page++;

        gallery.trigger('page-turned',['br']);

    });


    gallery.on('click', '.prev', function(){

        page--;

        gallery.trigger('page-turned',['tl']);

    });


    win.on('resize', function(e){


        // Here we will monitor the resizing of the window

        // and will recalculate how many pictures we can show

        // at once and what their sizes should be so they fit perfectly


    }).resize();


    /* Animation functions */


    function show_photos_static(){


        // This function will show the images without any animations

    }


    function show_photos_with_animation_tl(){


        // This one will animate the images from the top-left


    }


    function show_photos_with_animation_br(){


        // This one will animate the images from the bottom-right


    }


    /* Helper functions */


    function get_per_page(){


        // Here we will calculate how many pictures

        // should be shown on current page


    }


    function get_page_start(p){


        // This function will tell us which is the first

        // photo that we will have to show on the given page


    }


    function is_next_page(){


        // Should we show the next arrow?


    }


    function is_prev_page(){


        // Should we show the previous arrow?


    }


});
Algunas de las funciones definidas están vacías, aunque podrán ver el código más abajo. El primer grupo de definición de variables mantendrán el estado de la galería (dimensión, variedad de imágenes, página actual…). Utilizaremos detectores de eventos para una mejor organización del código.
Veamos el primero de estos detectores de eventos.
gallery.on('data-ready window-resized page-turned', function(event, direction){


    var cache = [],

        deferreds = [];


    gallery.trigger('loading');


    // The photos that we should be showing on the new screen

    var set = data.slice(get_page_start(), get_page_start() + get_per_page());


    $.each(set, function(){


        // Create a deferred for each image, so

        // we know when they are all loaded

        deferreds.push($.loadImage(this.thumb));


        // build the cache

        cache.push('<a href="' + this.large + '" class="swipebox"' +

                    'style="width:' + picture_width + 'px;height:' + picture_height + 'px;background-image:url(' + this.thumb + ')">'+

                    '</a>');

    });


    if(is_prev_page()){

        cache.unshift('<a class="prev" style="width:' + picture_width + 'px;height:' + picture_height + 'px;"></a>');

    }


    if(is_next_page()){

        cache.push('<a class="next" style="width:' + picture_width + 'px;height:' + picture_height + 'px;"></a>');

    }


    if(!cache.length){

        // There aren't any images

        return false;

    }


    // Call the $.when() function using apply, so that

    // the deferreds array is passed as individual arguments.

    // $.when(arg1, arg2) is the same as $.when.apply($, [arg1, arg2])


    $.when.apply($, deferreds).always(function(){


        // All images have been loaded!


        if(event.type == 'window-resized'){


            // No need to animate the photos

            // if this is a resize event


            gallery.html(cache.join(''));

            show_photos_static();


            // Re-initialize the swipebox

            $('#gallery .swipebox').swipebox();


        }

        else{


            // Create a fade out effect

            gallery.fadeOut(function(){


                // Add the photos to the gallery

                gallery.html(cache.join(''));


                if(event.type == 'page-turned' && direction == 'br'){

                    show_photos_with_animation_br();

                }

                else{

                    show_photos_with_animation_tl();

                }


                // Re-initialize the swipebox

                $('#gallery .swipebox').swipebox();


                gallery.show();


            });

        }


        gallery.trigger('loading-finished');

    });


});
Aunque las imágenes son añadidas al div #gallery en una sola operación, ellas son fijadas con la propiedad CSS “opacity:0”. Esto prepara el escenario para las funciones de animación. El primero de ellos muestra las fotos sin necesidad de una animación, mientras que los otros dos muestra dos tipos de animación diferentes: desde la esquina superior izquierda hasta la esquina inferior derecha y viceversa.
function show_photos_static(){


    // Show the images without any animations

    gallery.find('a').addClass('static');


}


function show_photos_with_animation_tl(){


    // Animate the images from the top-left


    var photos = gallery.find('a');


    for(var i=0; i<max_w_photos + max_h_photos; i++){


        var j = i;


        // Loop through all the lines

        for(var l = 0; l < max_h_photos; l++){


            // If the photo is not of the current line, stop.

            if(j < l*max_w_photos) break;


            // Schedule a timeout. It is wrapped in an anonymous

            // function to preserve the value of the j variable


            (function(j){

                setTimeout(function(){

                    photos.eq(j).addClass('show');

                }, i*50);

            })(j);


            // Increment the counter so it points to the photo

            // to the left on the line below


            j += max_w_photos - 1;

        }

    }

}


function show_photos_with_animation_br(){


    // Animate the images from the bottom-right


    var photos = gallery.find('a');


    for(var i=0; i<max_w_photos + max_h_photos; i++){


        var j = per_page - i;


        // Loop through all the lines

        for(var l = max_h_photos-1; l >= 0; l--){


            // If the photo is not of the current line, stop.

            if(j > (l+1)*max_w_photos-1) break;


            // Schedule a timeout. It is wrapped in an anonymous

            // function to preserve the value of the j variable


            (function(j){

                setTimeout(function(){

                    photos.eq(j).addClass('show');

                }, i*50);

            })(j);


            // Decrement the counter so it points to the photo

            // to the right on the line above


            j -= max_w_photos - 1;

        }

    }

}
La siguiente función será la que detecta el cambio del tamaño de la ventana. Esto puede ocurrir cuando la ventana cambia de tamaño o bien cuando se cambia la orientación de la misma. En esta función calcularemos el número de fotos que caben en la pantalla.
win.on('resize', function(e){


    var width = win.width(),

        height = win.height(),

        gallery_width, gallery_height,

        difference;


    // How many photos can we fit on one line?

    max_w_photos = Math.ceil(width/photo_default_size);


    // Difference holds how much we should shrink each of the photos

    difference = (max_w_photos * photo_default_size - width) / max_w_photos;


    // Set the global width variable of the pictures.

    picture_width = Math.ceil(photo_default_size - difference);


    // Set the gallery width

    gallery_width = max_w_photos * picture_width;


    // Let's do the same with the height:


    max_h_photos = Math.ceil(height/photo_default_size);

    difference = (max_h_photos * photo_default_size - height) / max_h_photos;

    picture_height = Math.ceil(photo_default_size - difference);

    gallery_height = max_h_photos * picture_height;


    // How many photos to show per page?

    per_page = max_w_photos*max_h_photos;


    // Resize the gallery holder

    gallery.width(gallery_width).height(gallery_height);


    gallery.trigger('window-resized');


}).resize();

Las siguientes funciones nos permitirán obtener algunos datos que se utilizan con mayor frecuencia.

function get_per_page(){


    // How many pictures should be shown on current page


    // The first page has only one arrow,

    // so we decrease the per_page argument with 1

    if(page == 0){

        return per_page - 1;

    }


    // Is this the last page?

    if(get_page_start() + per_page - 1 > data.length - 1){

        // It also has 1 arrow.

        return per_page - 1;

    }


    // The other pages have two arrows.

    return per_page - 2;

}


function get_page_start(p){


    // Which position holds the first photo

    // that is to be shown on the give page


    if(p === undefined){

        p = page;

    }


    if(p == 0){

        return 0;

    }


    // (per_page - 2) because the arrows take up two places for photos

    // + 1 at the end because the first page has only a next arrow.


    return (per_page - 2)*p + 1;

}


function is_next_page(){


    // Should we show the next arrow?


    return data.length > get_page_start(page + 1);

}


function is_prev_page(){


    // Should we show the previous arrow?


    return page > 0;

}
CSS
#gallery{

    position:fixed;

    top:0;

    left:0;

    width:100%;

    height:100%;

}


#gallery a{

    opacity:0;

    float:left;

    background-size:cover;

    background-position: center center;


    -webkit-transform:scale(0.8);

    -moz-transform:scale(0.8);

    transform:scale(0.8);


    -webkit-transition:0.4s;

    -moz-transition:0.4s;

    transition:0.4s;

}


#gallery a.static:hover,

#gallery a.show:hover{

    opacity:0.9 !important;

}


#gallery a.static{

    opacity:1;


    -webkit-transform:none;

    -moz-transform:none;

    transform:none;


    -webkit-transition:opacity 0.4s;

    -moz-transition:opacity 0.4s;

    transition:opacity 0.4s;

}


#gallery a.next,

#gallery a.prev{

    background-color:#333;

    cursor:pointer;

}


#gallery a.next{

    background-image:url('../img/arrow_next.jpg');

}


#gallery a.prev{

    background-image:url('../img/arrow_prev.jpg');

}


#gallery a.show{

    opacity:1;


    -webkit-transform:scale(1);

    -moz-transform:scale(1);

    transform:scale(1);

}
Pueden ver el ejemplo en funcionamiento en este enlace.
Si quieren descargarse el código, lo pueden hacer en este otro enlace.
Vía: Tutorialzine


